Monday, August 29, 2016

Chessbot Hero - White

I finally got around to doing the white version of the Chessbot Hero.

I am really disliking this white ABS filament. It's not sticking well (at all!) to the build plate, and I had to up the extrusion rate by 12% relative to the black ABS filament to get things looking half-way decent. Additionally, it seems relatively brittle. I spent several hours this weekend working on adjusting the printer to get a successful print.


I printed this one at its original scale, and it actually snapped together pretty well (one of the knights cracked in the process, unfortunately). This one can actually stand, unlike the black version, which I printed with a 1.5 scaling factor:


Original file here.
Nozzle: 220C
Bed: 100C
Chamber: 50C
Layer height: 0.2mm
Speed: 40mm/s
Time: 6 hours
Material: Hatchbox ABS

Unfortunately, the next print I attempted resulted in a jammed nozzle. 

Sunday, August 21, 2016

LED Accent Lamp


I have had this project in the back of my mind for a couple months, ever since seeing something similar pop up for $200. I picked up the electronics from China a while ago, but my ideas for the lamp body kept getting more and more complex. I finally decided to just knock this out over the weekend as a proof-of-concept.

I picked up a seven-foot length of trim with the cross-section I needed, and painted it white:


I then added three five-foot strips of RGB+WW (Red Green Blue + Warm White) LED strips and wired each strip to its own controller:


I shoved all the electronics in a section of vinyl drain pipe:


And then put the lamp in the corner.


Total cost was around $60.

There are a couple things I would do differently for a second version: the adhesive on the LED strips is pretty bad. I tacked the top and bottom of each strip in place with superglue, which is probably the only reason the LED strips have not fallen down already. Also, if I did this again, I would buy proper connectors for the LED strips rather than relying on my suspect soldering skills. Finally, using three controllers rather than one added $25 to the bill of materials, without adding a whole lot of functionality.

One interesting point: by setting one strip each to Red, Blue and Green, the light looks white, except at the edges.

But overall, I am very pleased without this project turned out!

Sunday, August 7, 2016

Printer is Running Again!

Unfortunately, I needed the kick-in-the-butt of my Dad coming out for a visit to prompt me to tear down and fix my printer.

I pulled off the heated-enclosure brackets and lifted the bed in order to access the stepper motors, then put locktite on all the motor pulleys.


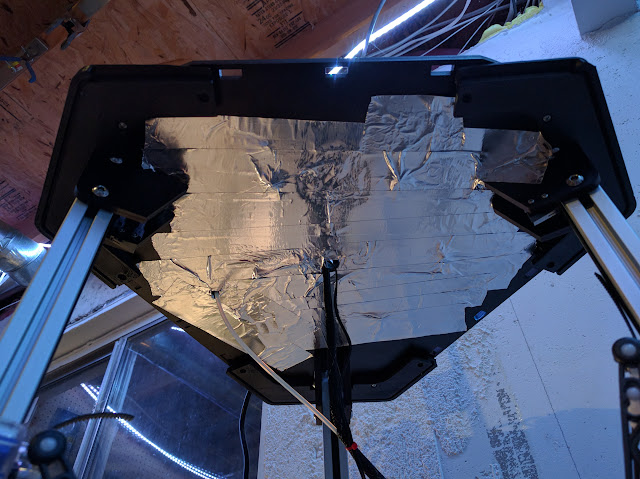
I also worked on the heat source for the heated chamber. Having two 150 watt bulbs right next to each other and inside a metal box concentrated the heat onto the top plate worse than I had realized. Here's the damage, viewed from below with the bulbs and fixtures removed:


To prevent this from happening again, I covered the bottom of the top plate with aluminum tape:


Later on, I'll clean it up and add some ceramic insulation around the bulb fixtures (I have to find it again - it got lost in my sea of stuff).

After a quick re-assembly (and some really quick calibration), I ran the file for "knurled bolt and nut", this time with white filament. All things considered, it turned out pretty well, though not as nice as the previous two I made.


All in all, it was some good male bonding, and Dad took the bolt and nut home as a souvenir!